Connect ClickHouse to Deepnote
Deepnote is a collaborative data notebook built for teams to discover and share insights. In addition to being Jupyter-compatible, it works in the cloud and provides you with one central place to collaborate and work on data science projects efficiently.This guide assumes you already have a Deepnote account and that you have a running ClickHouse instance.
Interactive example
If you would like to explore an interactive example of querying ClickHouse from Deepnote data notebooks, click the button below to launch a template project connected to the ClickHouse playground.
Connect to ClickHouse
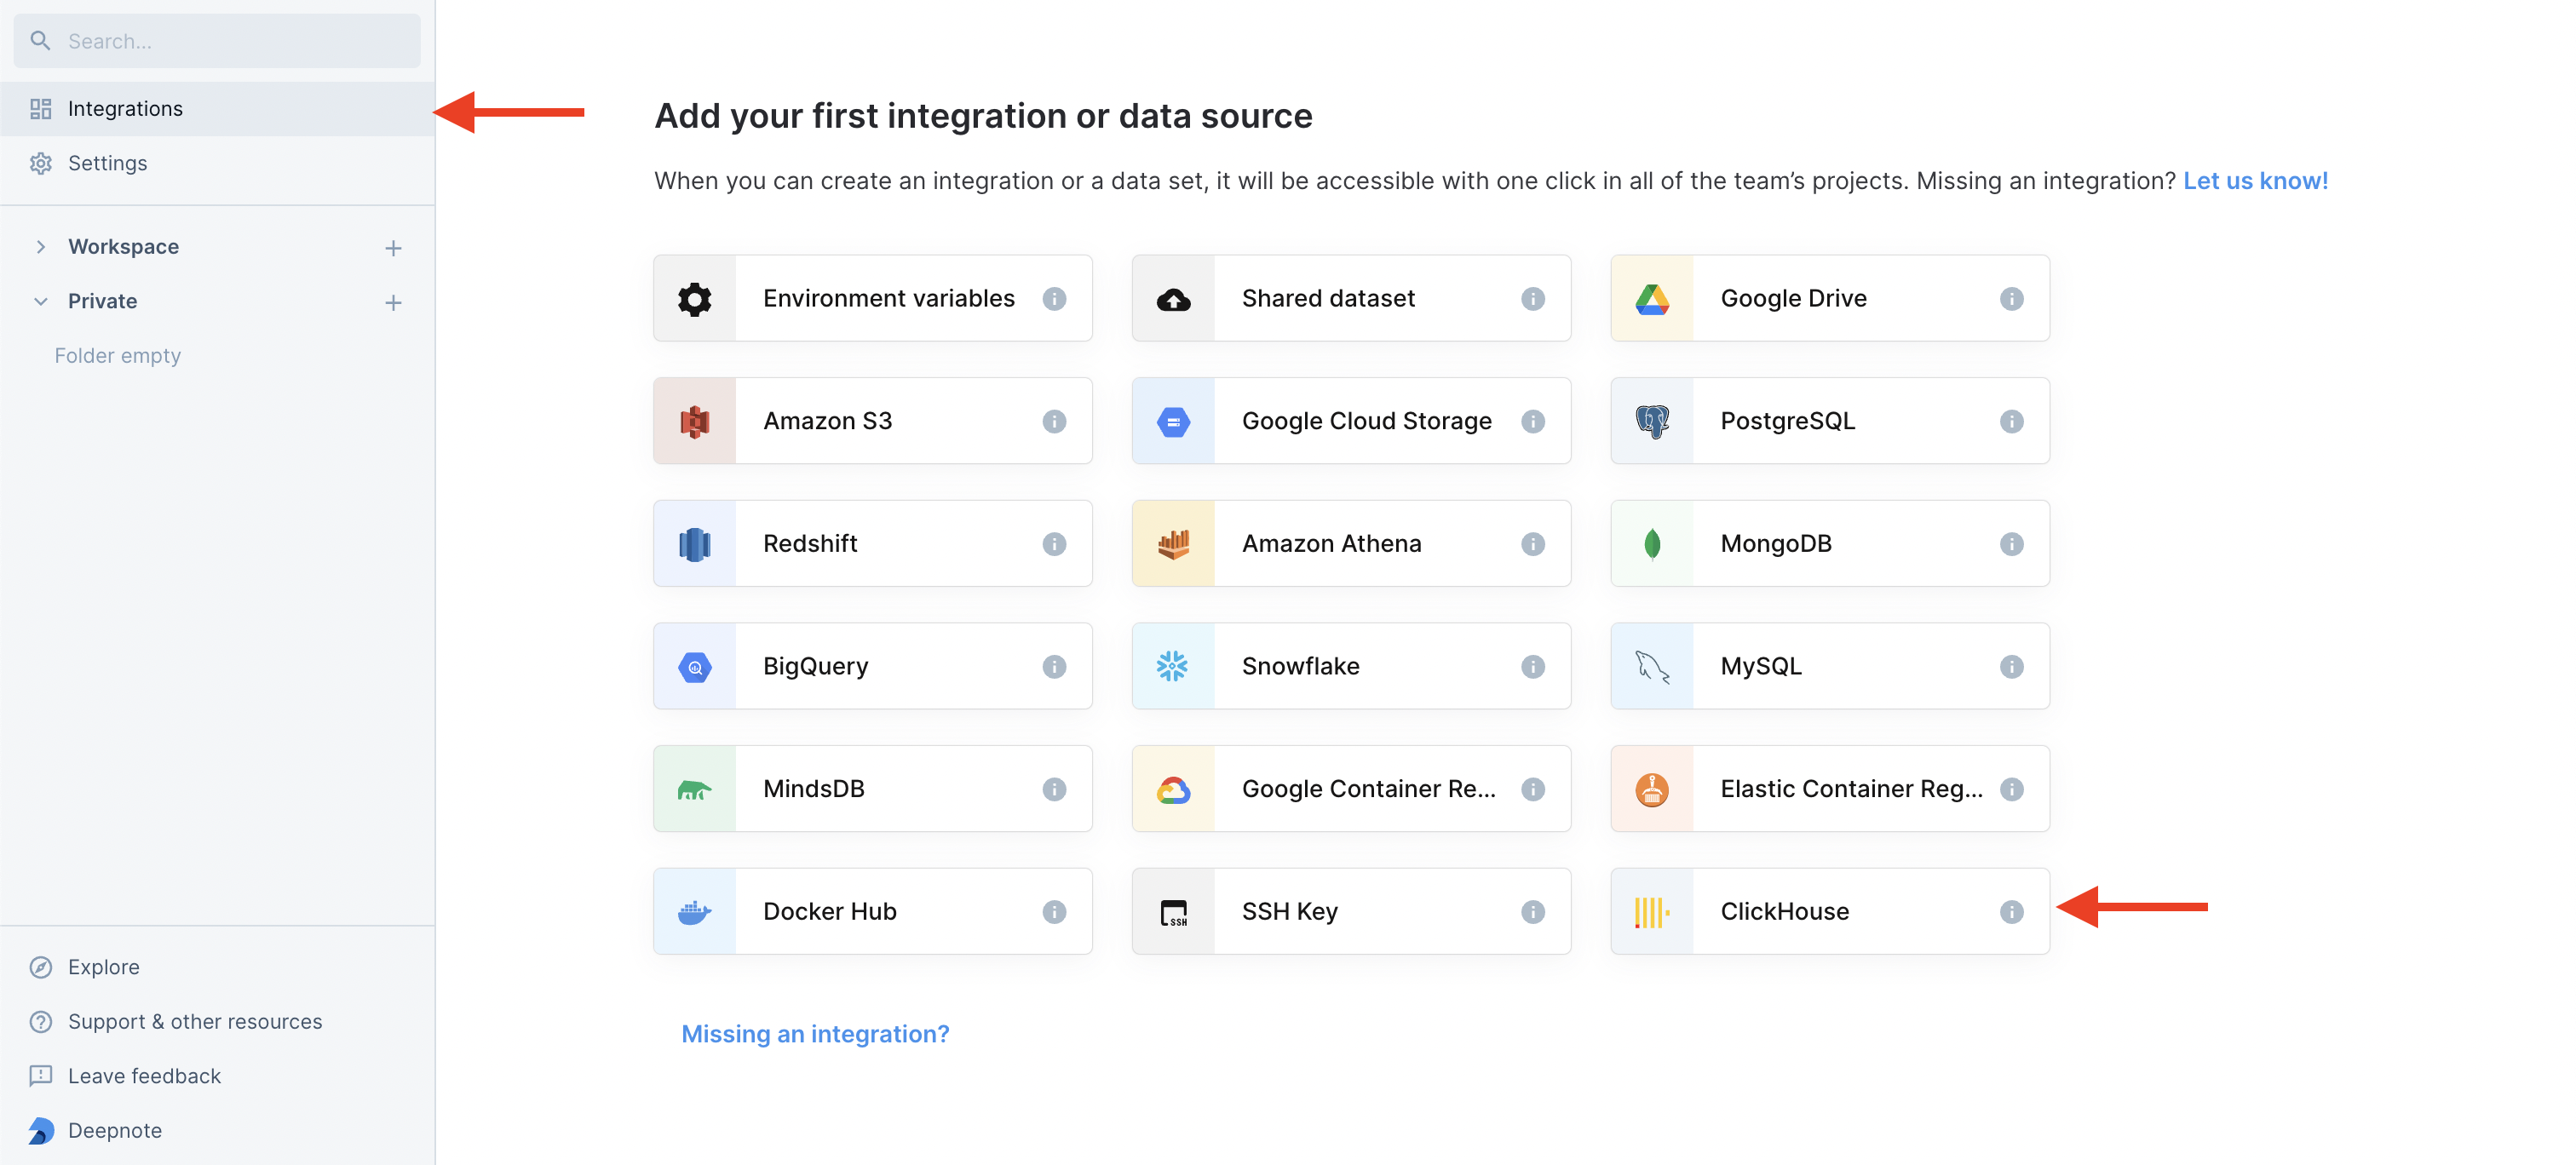
- Within Deepnote, select the "Integrations" overview and click on the ClickHouse tile.
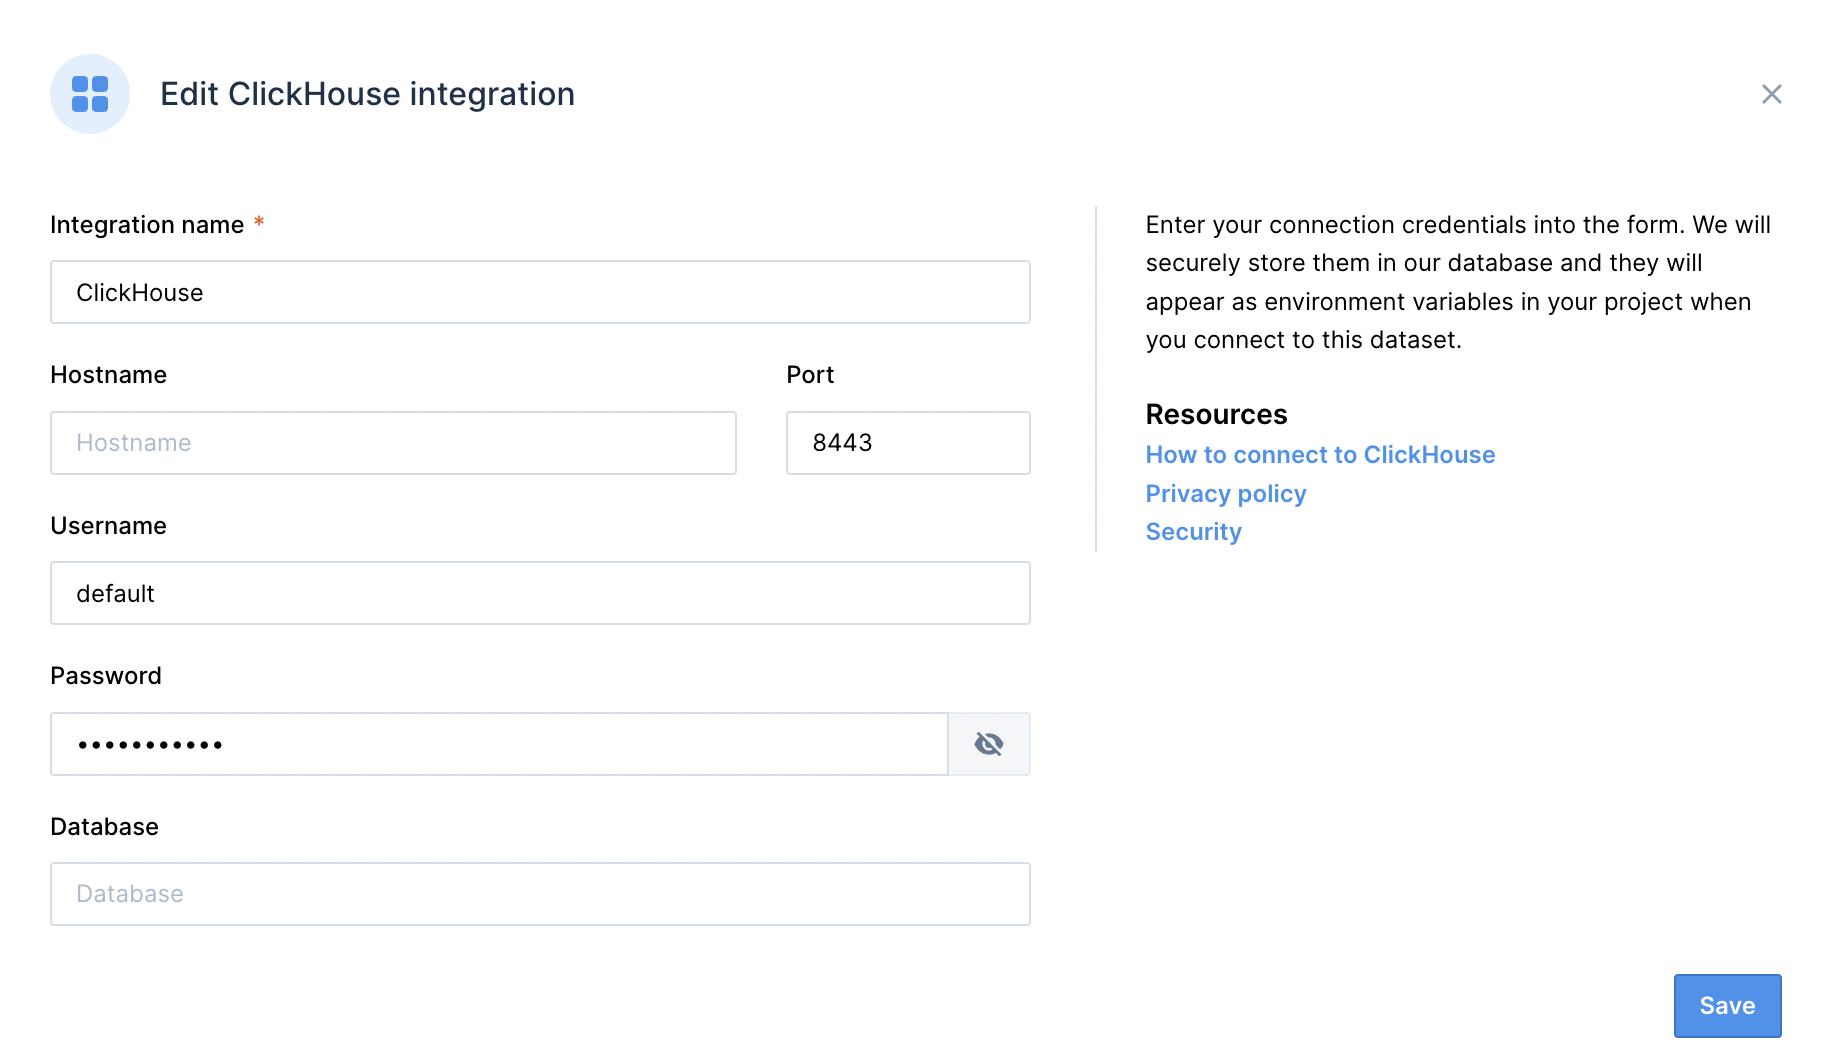
Provide the connection details for your ClickHouse instance:
To connect to ClickHouse with HTTP(S) you need this information:
The HOST and PORT: typically, the port is 8443 when using TLS or 8123 when not using TLS.
The DATABASE NAME: out of the box, there is a database named
default, use the name of the database that you want to connect to.The USERNAME and PASSWORD: out of the box, the username is
default. Use the username appropriate for your use case.
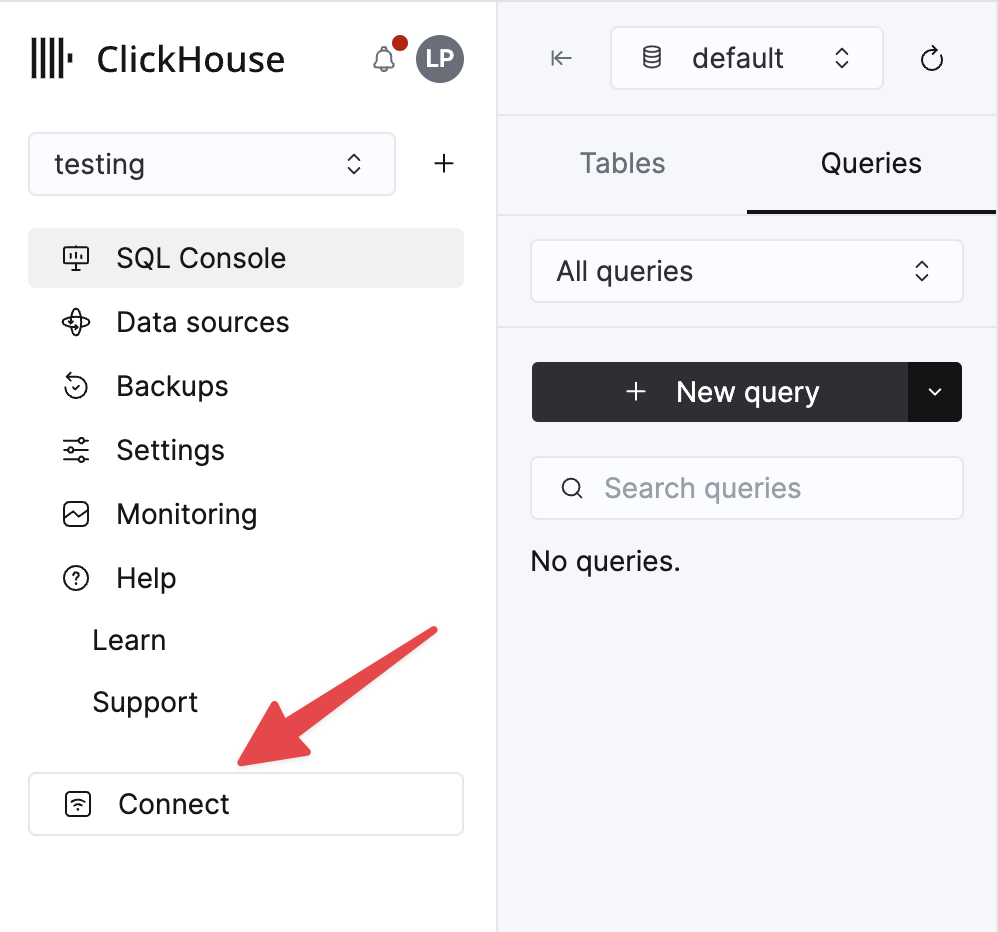
The details for your ClickHouse Cloud service are available in the ClickHouse Cloud console. Select the service that you will connect to and click Connect:
Choose HTTPS, and the details are available in an example
curlcommand.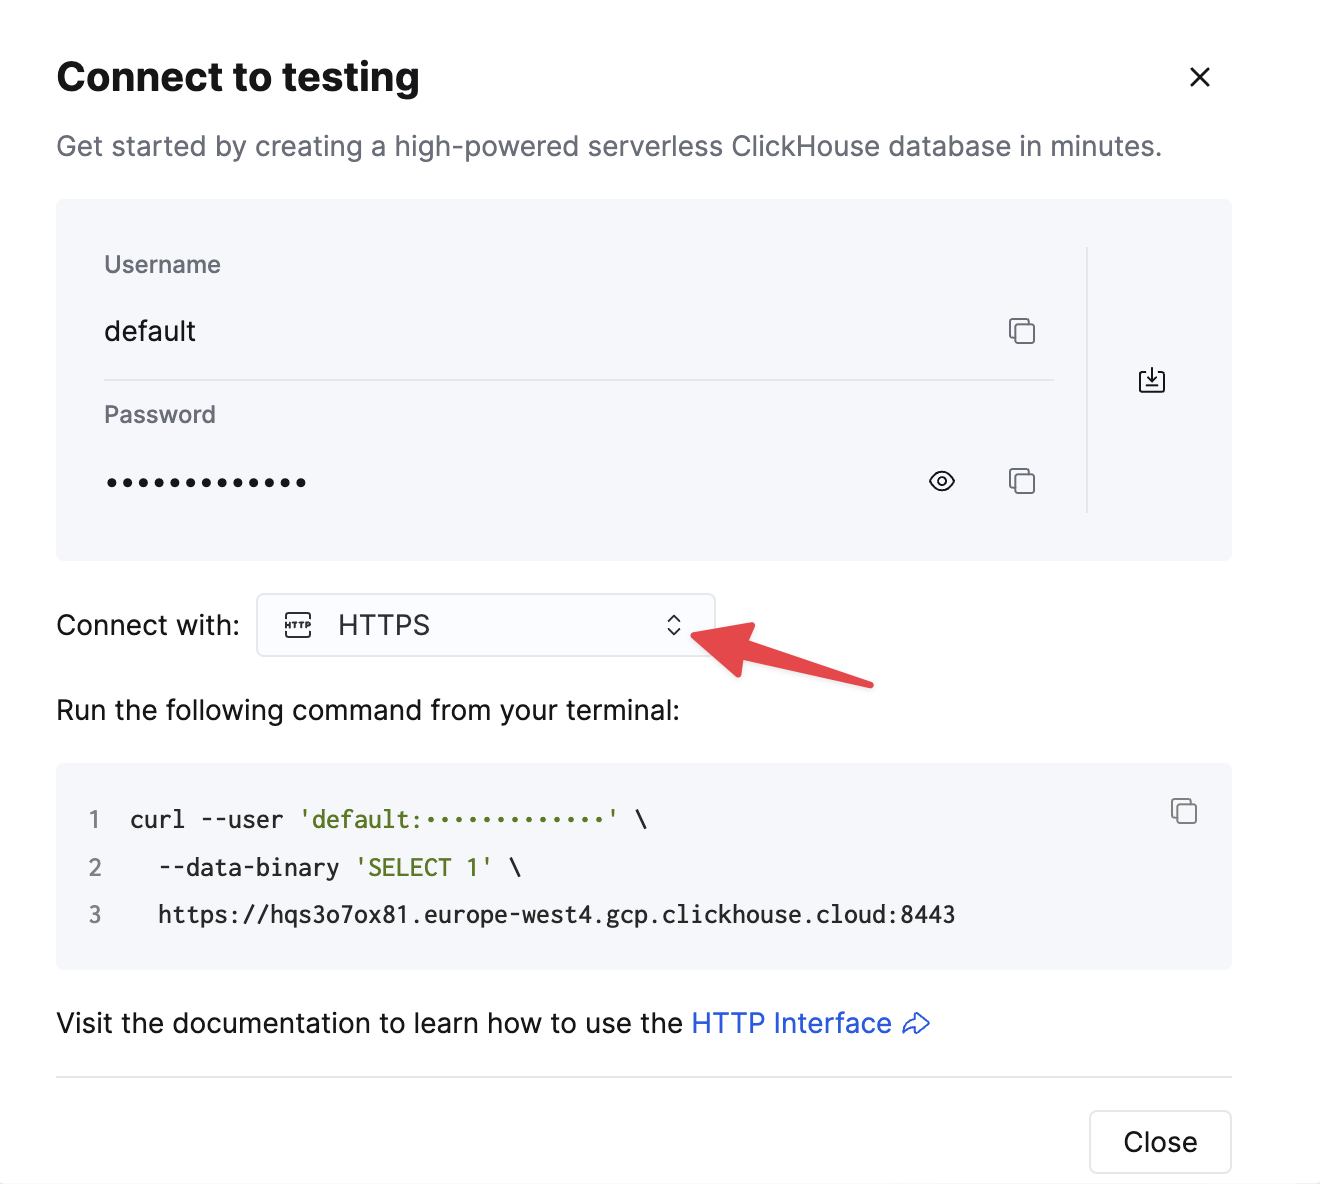
If you are using self-managed ClickHouse, the connection details are set by your ClickHouse administrator.
NOTE: If your connection to ClickHouse is protected with an IP Access List, you might need to allow Deepnote's IP addresses. Read more about it in Deepnote's docs.
Congratulations! You have now integrated ClickHouse into Deepnote.
Using ClickHouse integration.
Start by connecting to the ClickHouse integration on the right of your notebook.
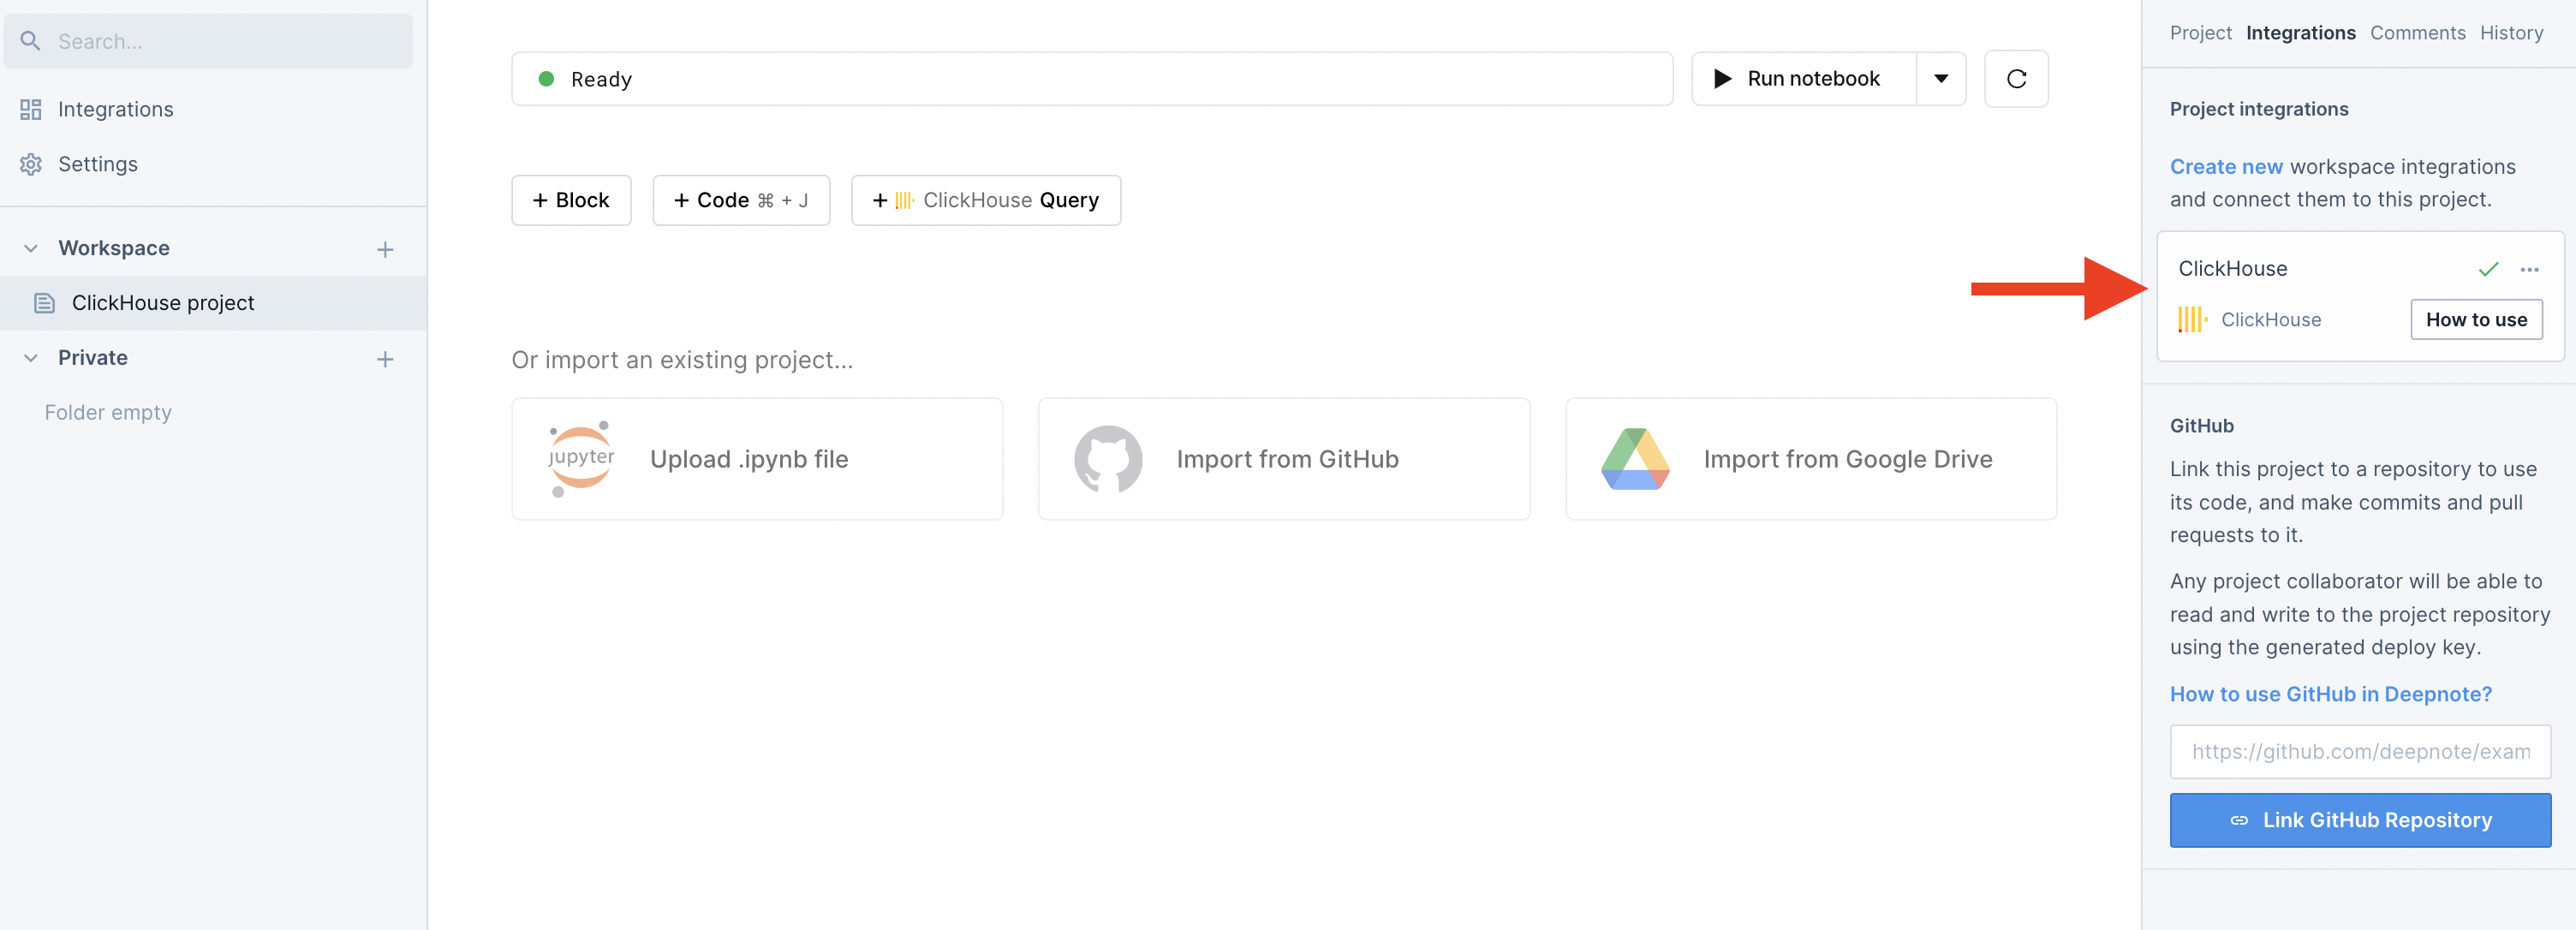
Now create a new ClickHouse query block and query your database. The query results will be saved as a dataframe and stored in the variable specified in the SQL block.
You can also convert any existing SQL block to a ClickHouse block.